Showing posts with label easy. Show all posts

Wednesday, September 18, 2013

DIY Photo Frame Jewelry Display

Hey guys!

So today, I am showing you a really cool DIY that really organizes but also display your bracelets and necklaces in an chic way. Most of the products used in this DIY is about $10 or less, depending on where you get it and what materials you wanted for this. So lets get started!!


Materials needed:
-Picture frame,any size(I used 8x11 old,vintage picture frame) ($3)
-Some old magazines, or print out some cool pictures
-Cardboard,preferably thick(cut to fit into frame)
-Gluestick ($1)
-Mini hanging hooks(I used tacks) ($1 for pack of 30 tacks)
-Scissors ($1)
-Ruler
-Marker/pencil
-Decorations: ribbons, jewels,stickers,gems,etc.(optional)


 1) Take out the glass and covering of the frame and put it aside or toss it away.

 2) Take some old magazines or look online for some cool pictures, be it inspirational, pretty, beauty, fashion, cute, quotes, etc. and take the pages out/print them.

Some of my favorite magazines

Some cool magazine pages
3) Cut out each picture, phrases, quotes, etc. Lay them all out.

4) On your cut out cardboard,sized and fitted to the picture frame, lay out each magazine/picture on the cardboard. DO NOT GLUE until you know that your completely satisfied with the results.
Top,up close
Bottom, up close
5) Before taking off everything, take a picture of the clippings first and then start gluing everything. The reason why is because you might end up forgetting where exactly you put each clipping, like I did.


6) Place the cardboard with all the clippings,glued, back onto the frame and enclose it like so in the picture.

7) Then start measuring where to attach the hooks onto the display and dot it with a marker/pencil(if you decide to use the self-adhesive hooks,you can use the glass that came along with the frame). I measured mine about 2 inches in between each hook,horizontally, and about 4 inches below the first hook,vertical-wise. Attach the hooks, if your using tacks, make sure to leave at least a 1/4-1/2 cm like so below to allow the jewelry to hang.
See the black dots? Marking :)
Leave 1/4 - 1/2 cm to allow jewelry to hang :)


8) Decorate with any of materials you wanna add on to the frame to your liking, like adding sparkles, stick-on gems, stickers, spray painting, etc. I like to keep mine simple so I just left it alone.

9) Place on the jewelry on the hooks and adjust anything that seems out of place.

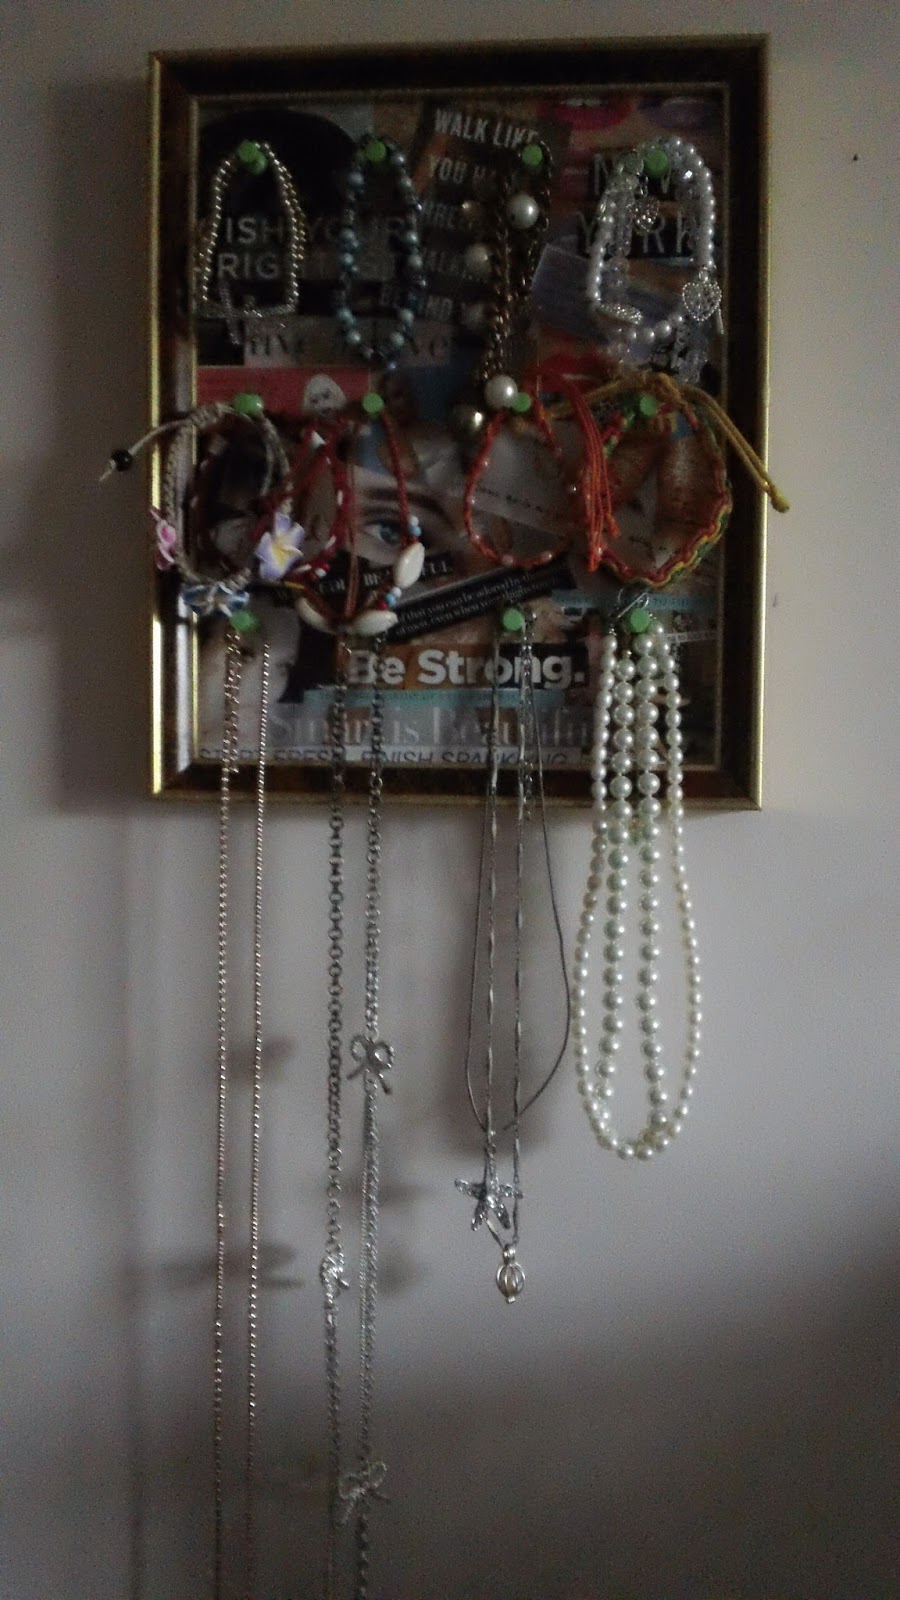
10) Place it on your wall and ta-da! A DIY photo frame jewelry display, all about $10 or less!


I really hope you like this jewelry display and send me pictures of your take on this DIY!! Thanks so much!


See you next time! Bye!


Monday, November 19, 2012

Update + Feminine Girly Nail Tutorial

Hey guys, how have you been?!

So I've been pretty much bored and not really bothering with this site much cause I'm always on TUMBLR!!!! My tumblr page is my personal and latest addiction and this blog is the more serious, "I got to get to work" kind of blog where I share tips and tutorials. So yes! If you guys want, just follow me on Tumblr and you can be update on EVERYTHING from personal to whatever!!

Okay, so now on to the fun stuff!

Today I'm gonna be sharing a cute and feminine nail tutorial that is really easy to do. It's not a loud nail look but its like a subtle but polished girly nails.


So yeah, for some reason when I was doing this nail look for my nails, there were like these little bumps that appeared that made the nail look...bumpy...but believe me, it may have been the nail polish since I had this nail polish in my storage for a while. Also excuse my cracked nail on my thumb, it was breaking and I didn't have the heart to cut it until I took a picture of the nail tutorial! So yes, the struggle to just cut it was really high.

Materials and Nail Polish:
Essie #664 Mamba, Milani High Speed Fast Dry #22 White on the Spot, Sally Hansen Nail Art Pen in Pearly White

Paper & Bobby Pin/dotting tool
1) Ok so first paint a neutral pinks/nudes onto your nails. Paint until it is opaque. Let dry COMPLETELY. I'm using Essie #664 Mamba.
 2) Next using an off white or grey(only if you are using a lighter nail polish color as base), draw two lines parallel to each other at a diagonal angle of the nail. The white and nude color contrast each other so that it would make it stand out but not too much. So if you are using a light color such as a neutral pink, use a gray color to contrast with the pink. Here I'm using Sally Hansen Nail Art Pen in Pearly White.
 
3) Next, draw dots with the same nail art pen in between the two parallel lines like so.
4) Then take a white nail polish(or any nail polish color of your choice) and place some on a piece of paper. Take your dotting tool, which in my case a bobby pin, and dip one end of it into the nail polish. I'm using Milani High Speed Fast Dry in #22 White on the Spot.
5) Then on the bottom, opposite side of the parallel lines that was drawn earlier, draw a heart with the dotting tool. To do this, just pretend you are writing the letter "V". Let dry COMPLETELY.
6) Now all that needs to be done is to apply top coat and your done!


Alright so I hope you like this tutorial and ask questions or comment below if you have anything to say.

See ya later!!